Introduction
If you’ve ever heard the unmistakable click-clack of your dog’s nails tapping across your hardwood floor, you’re not alone—and you’re probably wondering: Is it time for a trim? Overgrown nails aren’t just noisy; they can lead to discomfort, posture issues, and even long-term joint problems for your furry friend. Yet, for many pet owners, nail trimming feels like a daunting chore, often postponed until it’s absolutely unavoidable (or until the vet gently reminds you during your dog’s annual check-up).
The truth is, trimming your dog’s nails doesn’t have to be stressful—for you or your pup. With the right tools, a calm approach, and a little know-how, you can turn this routine grooming task into a bonding experience that keeps your dog healthy and comfortable. In this article, we’ll walk you through everything you need to know to safely and confidently trim your dog’s nails at home. From understanding nail anatomy to mastering the perfect technique (and what to do if things go wrong), you’ll gain practical tips, expert insights, and peace of mind. Whether your dog is a wriggly puppy or a seasoned senior, this guide is designed to help you handle nail care like a pro.
Why Regular Nail Trimming Matters
Many dog owners don’t realize that nail health is closely tied to overall mobility and well-being. Unlike wild canines, who naturally wear down their nails through constant movement over rough terrain, domesticated dogs often spend time on soft surfaces like carpets, grass, or indoor flooring—surfaces that don’t provide enough friction to keep nails short.
When nails grow too long, they can alter the way a dog walks. Imagine walking in heels that are two sizes too big—your posture shifts, your balance changes, and your joints take on extra strain. Similarly, dogs with overgrown nails may walk on the sides of their paws or tuck their toes under, leading to pain, arthritis, or even deformities over time.
Beyond physical discomfort, long nails are also prone to splitting, cracking, or getting caught in fabrics and carpets—situations that can cause sudden injury or bleeding. In extreme cases, nails can curl back into the paw pad, causing infection and intense pain.
Regular trimming—typically every 3 to 4 weeks—helps prevent these issues and supports healthy posture, gait, and joint function. Plus, well-maintained nails reduce the risk of scratches on furniture (or you!) and make paw handling easier during vet visits or grooming sessions.
Understanding Your Dog’s Nail Anatomy
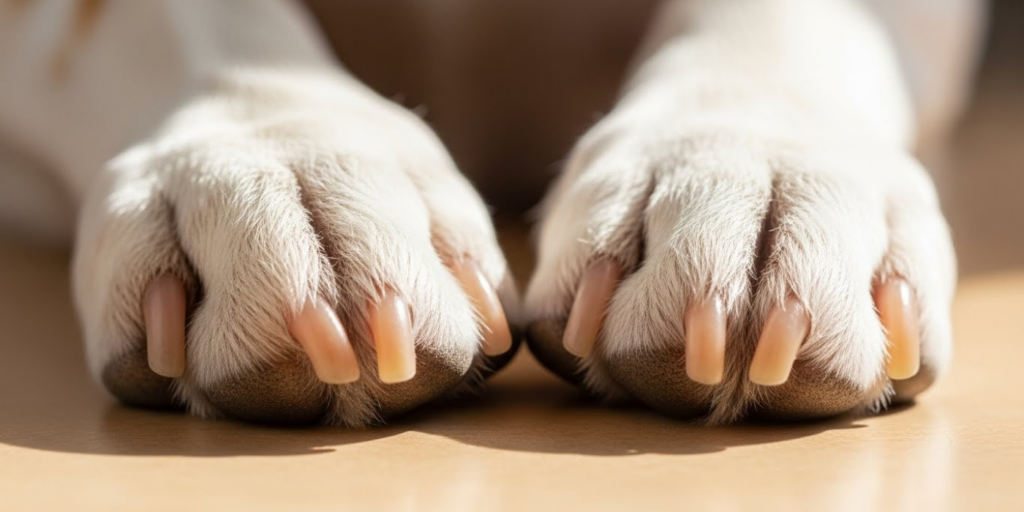
Before you pick up the clippers, it’s essential to understand what’s inside your dog’s nail. At the core lies the quick—a bundle of blood vessels and nerves that supplies the nail with nutrients. Cutting into the quick is painful and causes bleeding, which is why many dogs (and owners) fear nail trims.
In dogs with light-colored nails, the quick appears as a pinkish area inside the nail. You can usually see it clearly, making it easier to avoid. However, in dogs with black or dark nails, the quick isn’t visible from the outside, which increases the risk of accidental cuts.
This doesn’t mean dark-nailed dogs are impossible to trim—it just requires extra caution. The key is to trim small amounts at a time, especially if you’re unsure of the quick’s location. Over successive trims, the quick will naturally recede, allowing you to gradually shorten the nail safely.
It’s also worth noting that dewclaws—the small, thumb-like nails on the inside of some dogs’ legs—don’t touch the ground and therefore don’t wear down naturally. These often require more frequent attention and are commonly overlooked.
Understanding this anatomy not only helps you trim more safely but also builds empathy for your dog’s experience. If they flinch or pull away, it may be because they’ve been hurt before—or they sense your hesitation. A calm, confident approach makes all the difference.
Choosing the Right Tools for the Job
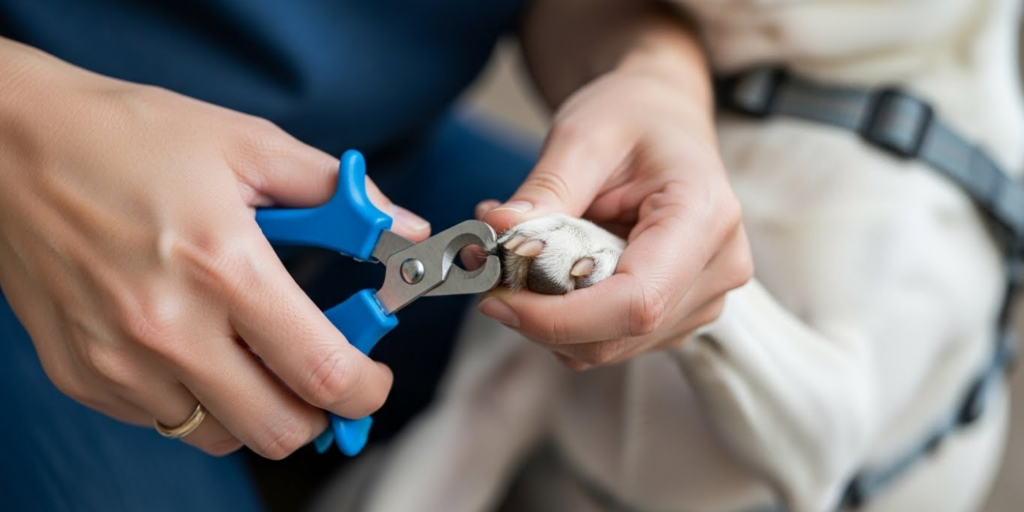
Not all nail trimmers are created equal, and using the wrong tool can make the process frustrating or even harmful. The two most common types are guillotine-style clippers and scissor-style clippers.
- Guillotine clippers have a small hole where the nail is inserted, and a blade slices down when you squeeze the handle. They work well for small to medium dogs and offer good control.
- Scissor-style clippers resemble regular scissors but with curved blades designed to cradle the nail. These are often preferred for larger breeds with thicker nails.
For dogs with very thick or hard nails (like many large breeds), a nail grinder (such as a Dremel) can be a gentler alternative. Grinders file the nail down gradually, reducing the risk of cutting the quick and smoothing rough edges. However, they require patience, as the sound and vibration may unsettle some dogs.
Regardless of your tool choice, sharpness matters. Dull blades can crush or splinter the nail instead of making a clean cut, causing discomfort or injury. Keep your tools clean and replace them when they start to lose their edge.
Also, always have styptic powder (or cornstarch in a pinch) on hand. This stops bleeding quickly if you accidentally nick the quick—keeping both you and your dog calm in the moment.
Preparing Your Dog for a Stress-Free Trim
Even with the best tools, a successful nail trim starts long before the first snip. Dogs are highly sensitive to human energy, so if you’re anxious, your dog will sense it. Preparation is about building trust and creating positive associations.
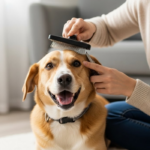
Start by handling your dog’s paws regularly, even when you’re not trimming nails. Gently massage their toes, press on their pads, and mimic the motions of trimming. Reward them with treats and praise. Over time, this desensitization helps your dog feel safe and relaxed.
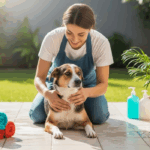
Choose a quiet, well-lit space where your dog feels comfortable. Have all your supplies within reach: clippers, styptic powder, treats, and maybe a favorite toy for distraction.
If your dog is especially anxious or has had a bad experience in the past, consider breaking the process into multiple short sessions. Trim just one or two nails per day rather than all at once. This builds confidence without overwhelming them.
For puppies, start early—but keep it playful. Let them sniff the clippers, give them treats during handling, and never force the issue. The goal is to make nail care a normal, non-threatening part of life.
Remember: patience is not just a virtue—it’s a necessity. Rushing leads to mistakes, and mistakes lead to fear. Go slow, stay calm, and celebrate small wins.
Step-by-Step Guide to Safe Nail Trimming
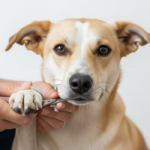
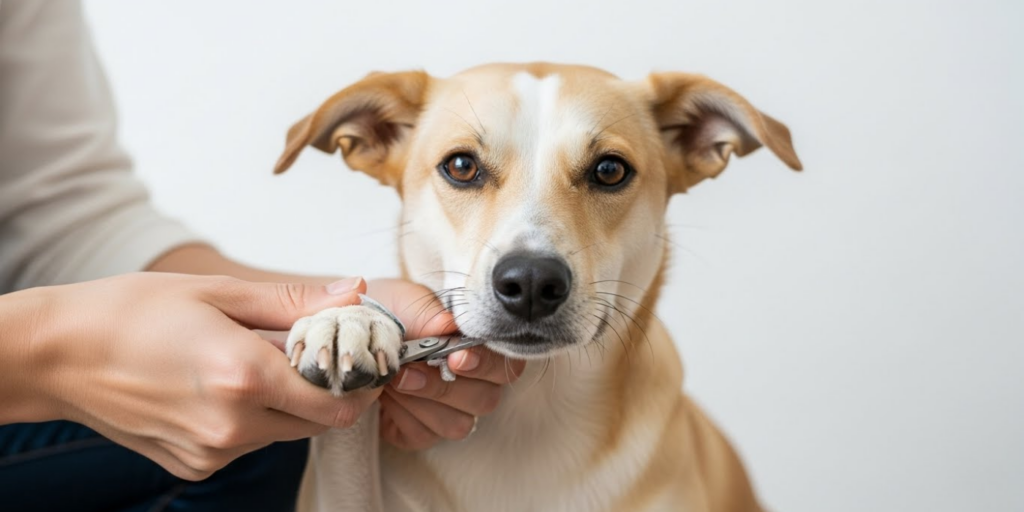
Now that your dog is relaxed and your tools are ready, it’s time to trim. Follow these steps for a smooth, safe experience:
- Secure your dog gently. For small dogs, place them on a non-slip surface like a grooming table or counter with a towel. Larger dogs can stay on the floor—stand beside or straddle them for stability. Never restrain harshly; use gentle pressure and soothing words.
- Hold the paw firmly but kindly. Use your non-dominant hand to hold the paw, spreading the toes slightly with your fingers. Support the leg to prevent sudden jerks.
- Identify the quick. In light nails, trim about 2–3 mm in front of the pink area. In dark nails, trim a tiny sliver off the tip at a 45-degree angle. Look at the cross-section after each cut—if you see a gray or black dot in the center, you’re approaching the quick. Stop there.
- Make clean, decisive cuts. Hesitation can crush the nail. Squeeze the clipper smoothly and confidently.
- File sharp edges (optional). If using clippers, a quick pass with a nail file or grinder prevents snagging.
- Reward generously. After each nail—or after the session—offer high-value treats and affection.
If your dog pulls away, take a break. Better to do half the nails today and finish tomorrow than force a full session that creates fear.
And if you do hit the quick? Stay calm. Apply styptic powder with light pressure for 30–60 seconds. Speak in a soothing voice—even though it bleeds more than it hurts, your dog will mirror your reaction.
What to Do If You Accidentally Cut the Quick
Mistakes happen—even to experienced groomers. If you nick the quick and your dog’s nail starts bleeding, don’t panic. Here’s how to handle it:
- Stay composed. Your dog will take emotional cues from you. A calm voice and gentle hands help them stay relaxed.
- Apply styptic powder or cornstarch. Dip the nail directly into the powder or press it firmly onto the tip. Hold for about a minute. Avoid wiping or blowing on it, as this can restart the bleeding.
- Distract and comfort. Offer a treat, gentle petting, or a favorite toy. Most dogs recover quickly once the bleeding stops.
- Don’t scold or apologize excessively. This can confuse your dog. Instead, treat it as a minor hiccup and move on.
Afterward, skip the remaining nails and try again in a day or two. One bad experience doesn’t have to define future trims—consistency and positivity will rebuild trust.
When to Seek Professional Help
While most dog owners can learn to trim nails at home, there are times when professional help is wise:
- Your dog is extremely fearful or aggressive during handling.
- The nails are severely overgrown or curled into the paw pad.
- You have a medical condition (like tremors) that makes steady clipping difficult.
- You simply lack confidence—and that’s okay!
Veterinarians, groomers, and professional trainers can perform trims safely and even demonstrate techniques you can use at home. Some offer “nail desensitization” sessions to help anxious dogs overcome their fear gradually.
Remember: asking for help isn’t failure—it’s responsible pet care.
Building a Long-Term Nail Care Routine
Consistency is the secret to stress-free nail maintenance. Set a calendar reminder every 3–4 weeks to check your dog’s nails. Even if they don’t need trimming, handling their paws regularly keeps them accustomed to the process.
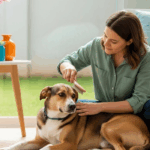
Pair nail checks with positive moments—like after a walk or during cuddle time. Over time, your dog will associate paw handling with good things, not just the clippers.
Also, consider supplements that support nail health. Biotin, omega fatty acids, and quality protein can strengthen nails, making them less prone to splitting.
Finally, observe your dog’s gait and behavior. If they seem reluctant to walk on hard floors, lick their paws excessively, or show signs of discomfort, overgrown nails might be the culprit—even if they don’t look long.
Conclusion
Trimming your dog’s nails safely is more than just a grooming task—it’s an act of care that enhances their comfort, mobility, and quality of life. While it may feel intimidating at first, with patience, the right tools, and a gentle approach, you can master this skill and even turn it into a quiet moment of connection with your pet.
We’ve covered why nail trimming matters, how to understand nail anatomy, which tools to use, how to prepare your dog, and step-by-step techniques to avoid the quick. We’ve also discussed what to do if things go wrong and when to seek professional support. Most importantly, we’ve emphasized that progress beats perfection—every small step builds confidence for both you and your dog.
Now it’s your turn. Don’t wait for the click-clack to become a clack-clack-CRUNCH. Pick up those clippers, offer a treat, and give it a try. Your dog’s paws—and joints—will thank you.
Have you trimmed your dog’s nails at home? What tips or challenges have you discovered? Share your experience in the comments below—we’d love to hear from you!

Lucas Neto is a passionate animal enthusiast who has spent years learning, caring, and connecting with pets of all kinds. His fascination with animals began in childhood and grew into a lifelong dedication to understanding their behavior, needs, and unique personalities. Whether rescuing strays, supporting responsible pet care, or simply enjoying the everyday joy that animals bring, Lucas is committed to sharing his knowledge and love for pets with others.